![]() Few years ago, I developed a WordPress plugin named Amikelive Adsense Widget. I was enthralled to see thousands of downloads for the plugin despite its simplicity. This post is not an announcement about a new release of the plugin despite the absence of simple-yet-powerful Google Adsense widget in the plugin repository. It’s rather a guide on how to display Google Adsense on the WordPress blog sidebar without using any Adsense plugin or widget. The steps are fairly simple, without any coding experience needed.
Few years ago, I developed a WordPress plugin named Amikelive Adsense Widget. I was enthralled to see thousands of downloads for the plugin despite its simplicity. This post is not an announcement about a new release of the plugin despite the absence of simple-yet-powerful Google Adsense widget in the plugin repository. It’s rather a guide on how to display Google Adsense on the WordPress blog sidebar without using any Adsense plugin or widget. The steps are fairly simple, without any coding experience needed.
If you happen to be using Amikelive Adsense widget, it can be necessary to note that the plugin is not actively developed anymore and I don’t have any plan to release newer version anytime soon or sometimes later. Such widget functionality is now built into WordPress, which we can simply take advantage of without reinventing the wheel.
Now on to the ad configuration part.
Step 1 Login to Google Adsense dashboard
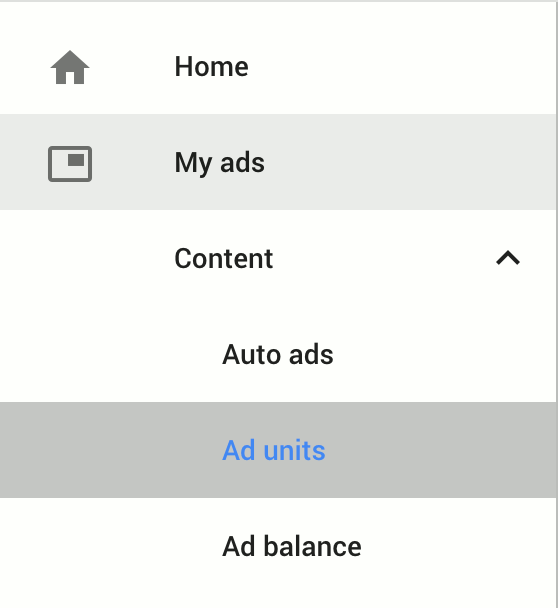
Step 2 After logging in, look at the menus on the left. Click “My Ads” > “Ad units”. From the content on the right, click “New ad unit” button.
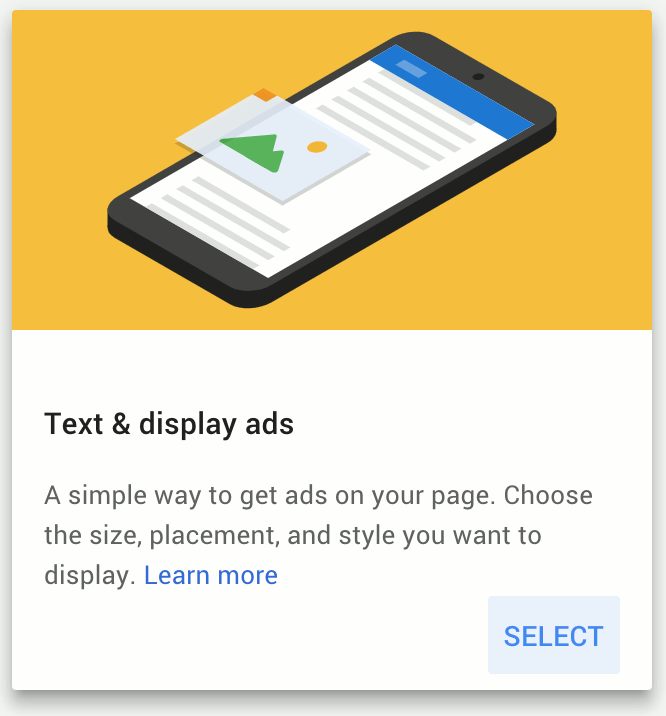
Step 3 From the ad type screen, choose “Text & display ads” and click “SELECT” to confirm.
Step 4 Fill the details of the ad.
* For the “Ad size” selection, we can simply choose the “Recommended” or the “Responsive” option.
* For the “Text ad style”, it’s suggested to go with the “Minimalist” style to make the ad less obtrusive
* For the “Custom channel”, you can create a new custom channel for the ad or use existing custom channel. In case of using existing custom channel, click the “include” floating button at the right side of a custom channel.
* For the “If no ads available” selection, you can go with default or show a solid color depending on the blog theme
Step 5 Save the ad by clicking “Save and get code” button. Copy the ad code to the clipboard or return to “Ad units” page and get the code later
Step 6 Login to WordPress admin dashboard
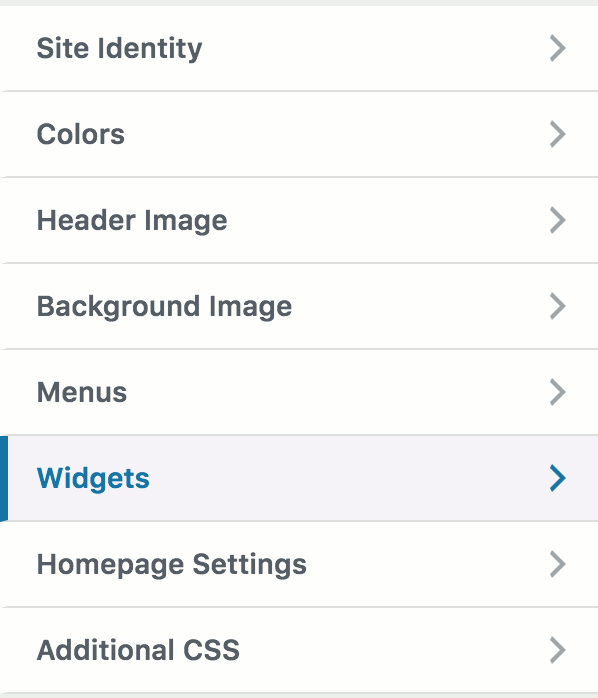
Step 7 From the menus on the left, select “Appearance” > “Themes”. You will see all available themes displayed. Find the active theme (usually the first theme on the top left) and click “Customize”
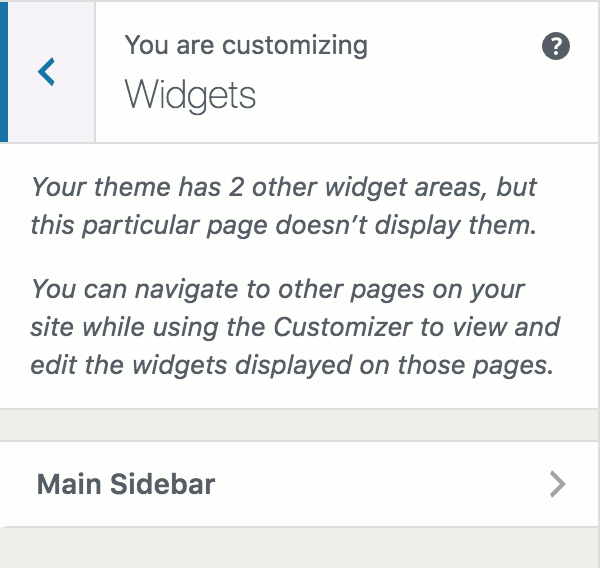
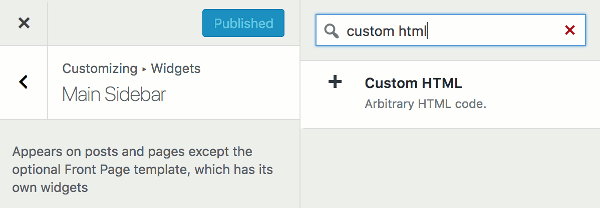
Step 8 Choose “Widget” from the menus on the left. Depending on the theme, there can be several widget areas. We are interested in the “Main Sidebar” widget. Click the “Main Sidebar” widget button to start placing the ad code on the sidebar with built-in WordPress widget
Step 9 From the widget list on the left, click “Add a Widget” button to search for available widgets. Type “Custom HTML” to find the Custom HTML widget and click on the widget entry to add it to the sidebar widget list
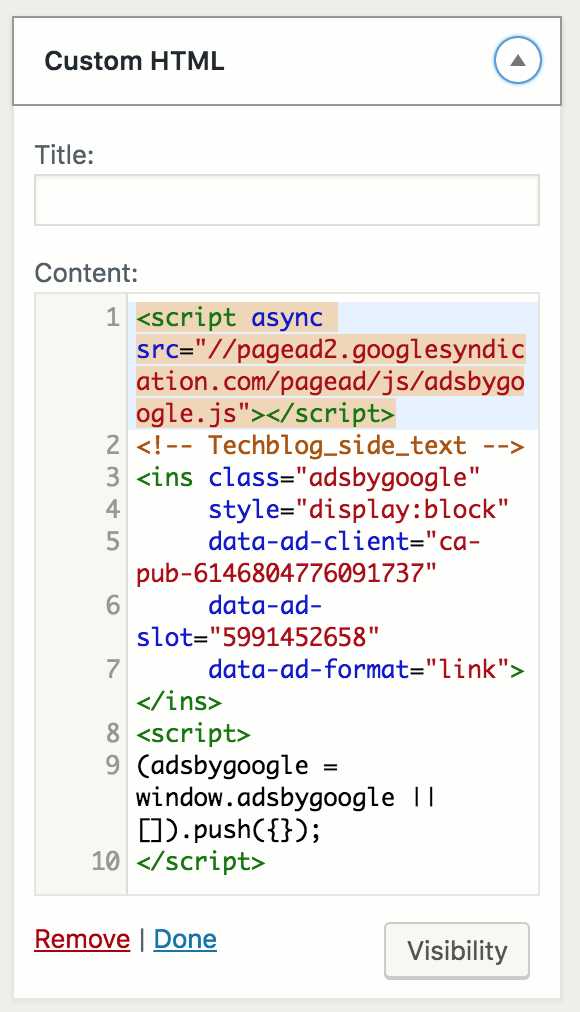
Step 10 Paste the ad code to the “Content” part of the Custom HTML widget. You may leave the “Title” part empty if you don’t want to assign special title to the sidebar ad section. Click “Done” to confirm the action
Step 11 Click “Publish” button at the top of the left section for widget customization.
Step 12 You’re done. Now you can check if the ad is properly displayed on the sidebar.
Troubleshooting
The ad section may be surrounded by yellow background as displayed below. What happened? Did we do anything wrong with the ad setup?
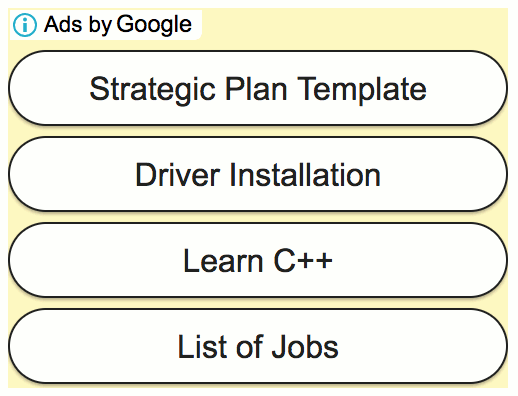
Fortunately, this is not an issue with the ad code but rather the default CSS used by the theme for <ins> element. You can prevent the yellow background by adding CSS that overrides the template’s default. To do so, from the theme customization menus (see image on Step 8), select “Additional CSS” and insert the following CSS code:
ins.adsbygoogle { background: transparent !important; }Click the “Publish” button at the top again, and verify that the yellow background has now disappeared.
Congratulations! You have now setup your sidebar ad without using any additional WordPress plugin. What a wonderful day.
Thank you for sharing this article with diagrams
Thanks a lot! Saved a lot of my time. This post helped me.
Glad to know that it helps.
Great post! Keep it up!
bhosar pappu
arayyy madar chooooaaaddd
Excellent guide! Your approach to displaying Google AdSense on a WordPress sidebar without using a widget is straightforward and practical. Thanks for the helpful tips!
Is it possible to optimize Adsense revenue by manually inserting ad code on a WordPress blog sidebar, rather than relying on plugins or widgets? How does this method compare in terms of performance and customization options?”,
“refusal