Last update: December 2nd, 2023
The last post about CUDA installation guide was for CUDA 9.2. We went through several types of CUDA installation methods, including the multiple-version CUDA installs. While the guide is still valid for CUDA 9.2, NVIDIA keeps releasing newer versions of CUDA. As a concrete example, when this article was first written in December 2018, the latest CUDA version was CUDA 10, taking the spotlight from CUDA 9.2. If we are about to upgrade to CUDA 10, how can we achieve so? Can we simply upgrade the CUDA toolkit without upgrading the display driver?
Handling CUDA Version Upgrade
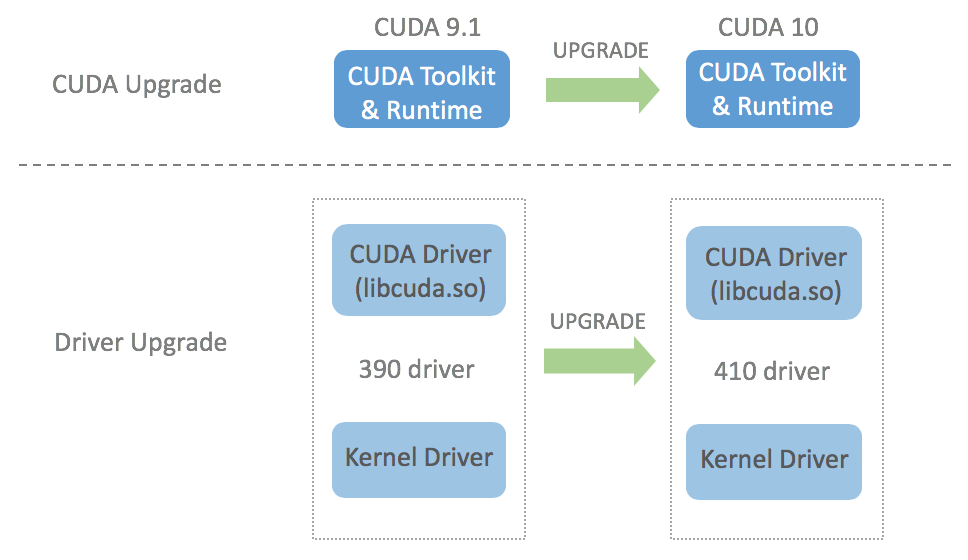
CUDA version upgrade itself can be a misleading term because since CUDA 8.0, multiple versions of CUDA can be installed on the same machine. But let’s have a simple scenario where we already have CUDA 9.1 installed and only want to upgrade to CUDA 10. NVIDIA states that each version of CUDA toolkit requires certain minimum NVIDIA display version that should be satisfied. This means that when upgrading to newer version of CUDA toolkit, we need to make sure that the currently installed display driver version is newer/bigger than the minimum compatible display driver version. In other words, standard CUDA upgrade involves two upgrade processes: CUDA (toolkit) upgrade and driver upgrade. The following picture visualizes the standard upgrade process from CUDA 9.1 to CUDA 10: the toolkit is upgraded from 9.1 to 10 and the driver is upgraded from 390 to 410.