![]() CUDA Deep Neural Network (cuDNN) is a library from NVIDIA that provides the GPU-accelerated primitives for deep learning such as convolution, pooling, normalization, activation layers, tensor transformation. With cuDNN, a machine learning researcher or developer can spend less time writing the implementation for low-level GPU performance tuning. The cuDNN library powers major deep learning frameworks such as Caffe, Caffe 2, Tensor Flow, Cognitive Toolkit and PyTorch.
CUDA Deep Neural Network (cuDNN) is a library from NVIDIA that provides the GPU-accelerated primitives for deep learning such as convolution, pooling, normalization, activation layers, tensor transformation. With cuDNN, a machine learning researcher or developer can spend less time writing the implementation for low-level GPU performance tuning. The cuDNN library powers major deep learning frameworks such as Caffe, Caffe 2, Tensor Flow, Cognitive Toolkit and PyTorch.
This post summarizes the steps to install cuDNN 7 for Cuda Toolkit 9.1 on Ubuntu 16.04. Installation for different version of cuDNN and Cuda Toolkit may require additional tweak or different steps that are not covered in this post.
Pre Installation
1. Verify that Cuda Toolkit has been installed
To check if Cuda Toolkit has been installed we run this command.
$ nvcc --versionThe command should output the information about the Cuda toolkit installed on the system. If the error message “bash: nvcc: command not found” is shown upon invoking the command, we need to install Cuda Toolkit. The installation guide for Cuda Toolkit 9.1 is elaborated in this post.
2. Download the cuDNN library
The cuDNN library is available for download from the cuDNN section of NVIDIA developer portal (URL: https://developer.nvidia.com/cudnn). Download is available only for those with NVIDIA developer accounts. If you do not have a developer account yet, you can simply sign up and have the account created for you.
On the download page, we will be shown with several versions of cuDNN library packages that are available for download. For Cuda Toolkit 9.1, we choose the newest version of cuDNN 7 packages as exemplified in the picture below (newer version may be available in the future). The minimum is to download the “Runtime Library” and “Developer Library” packages.
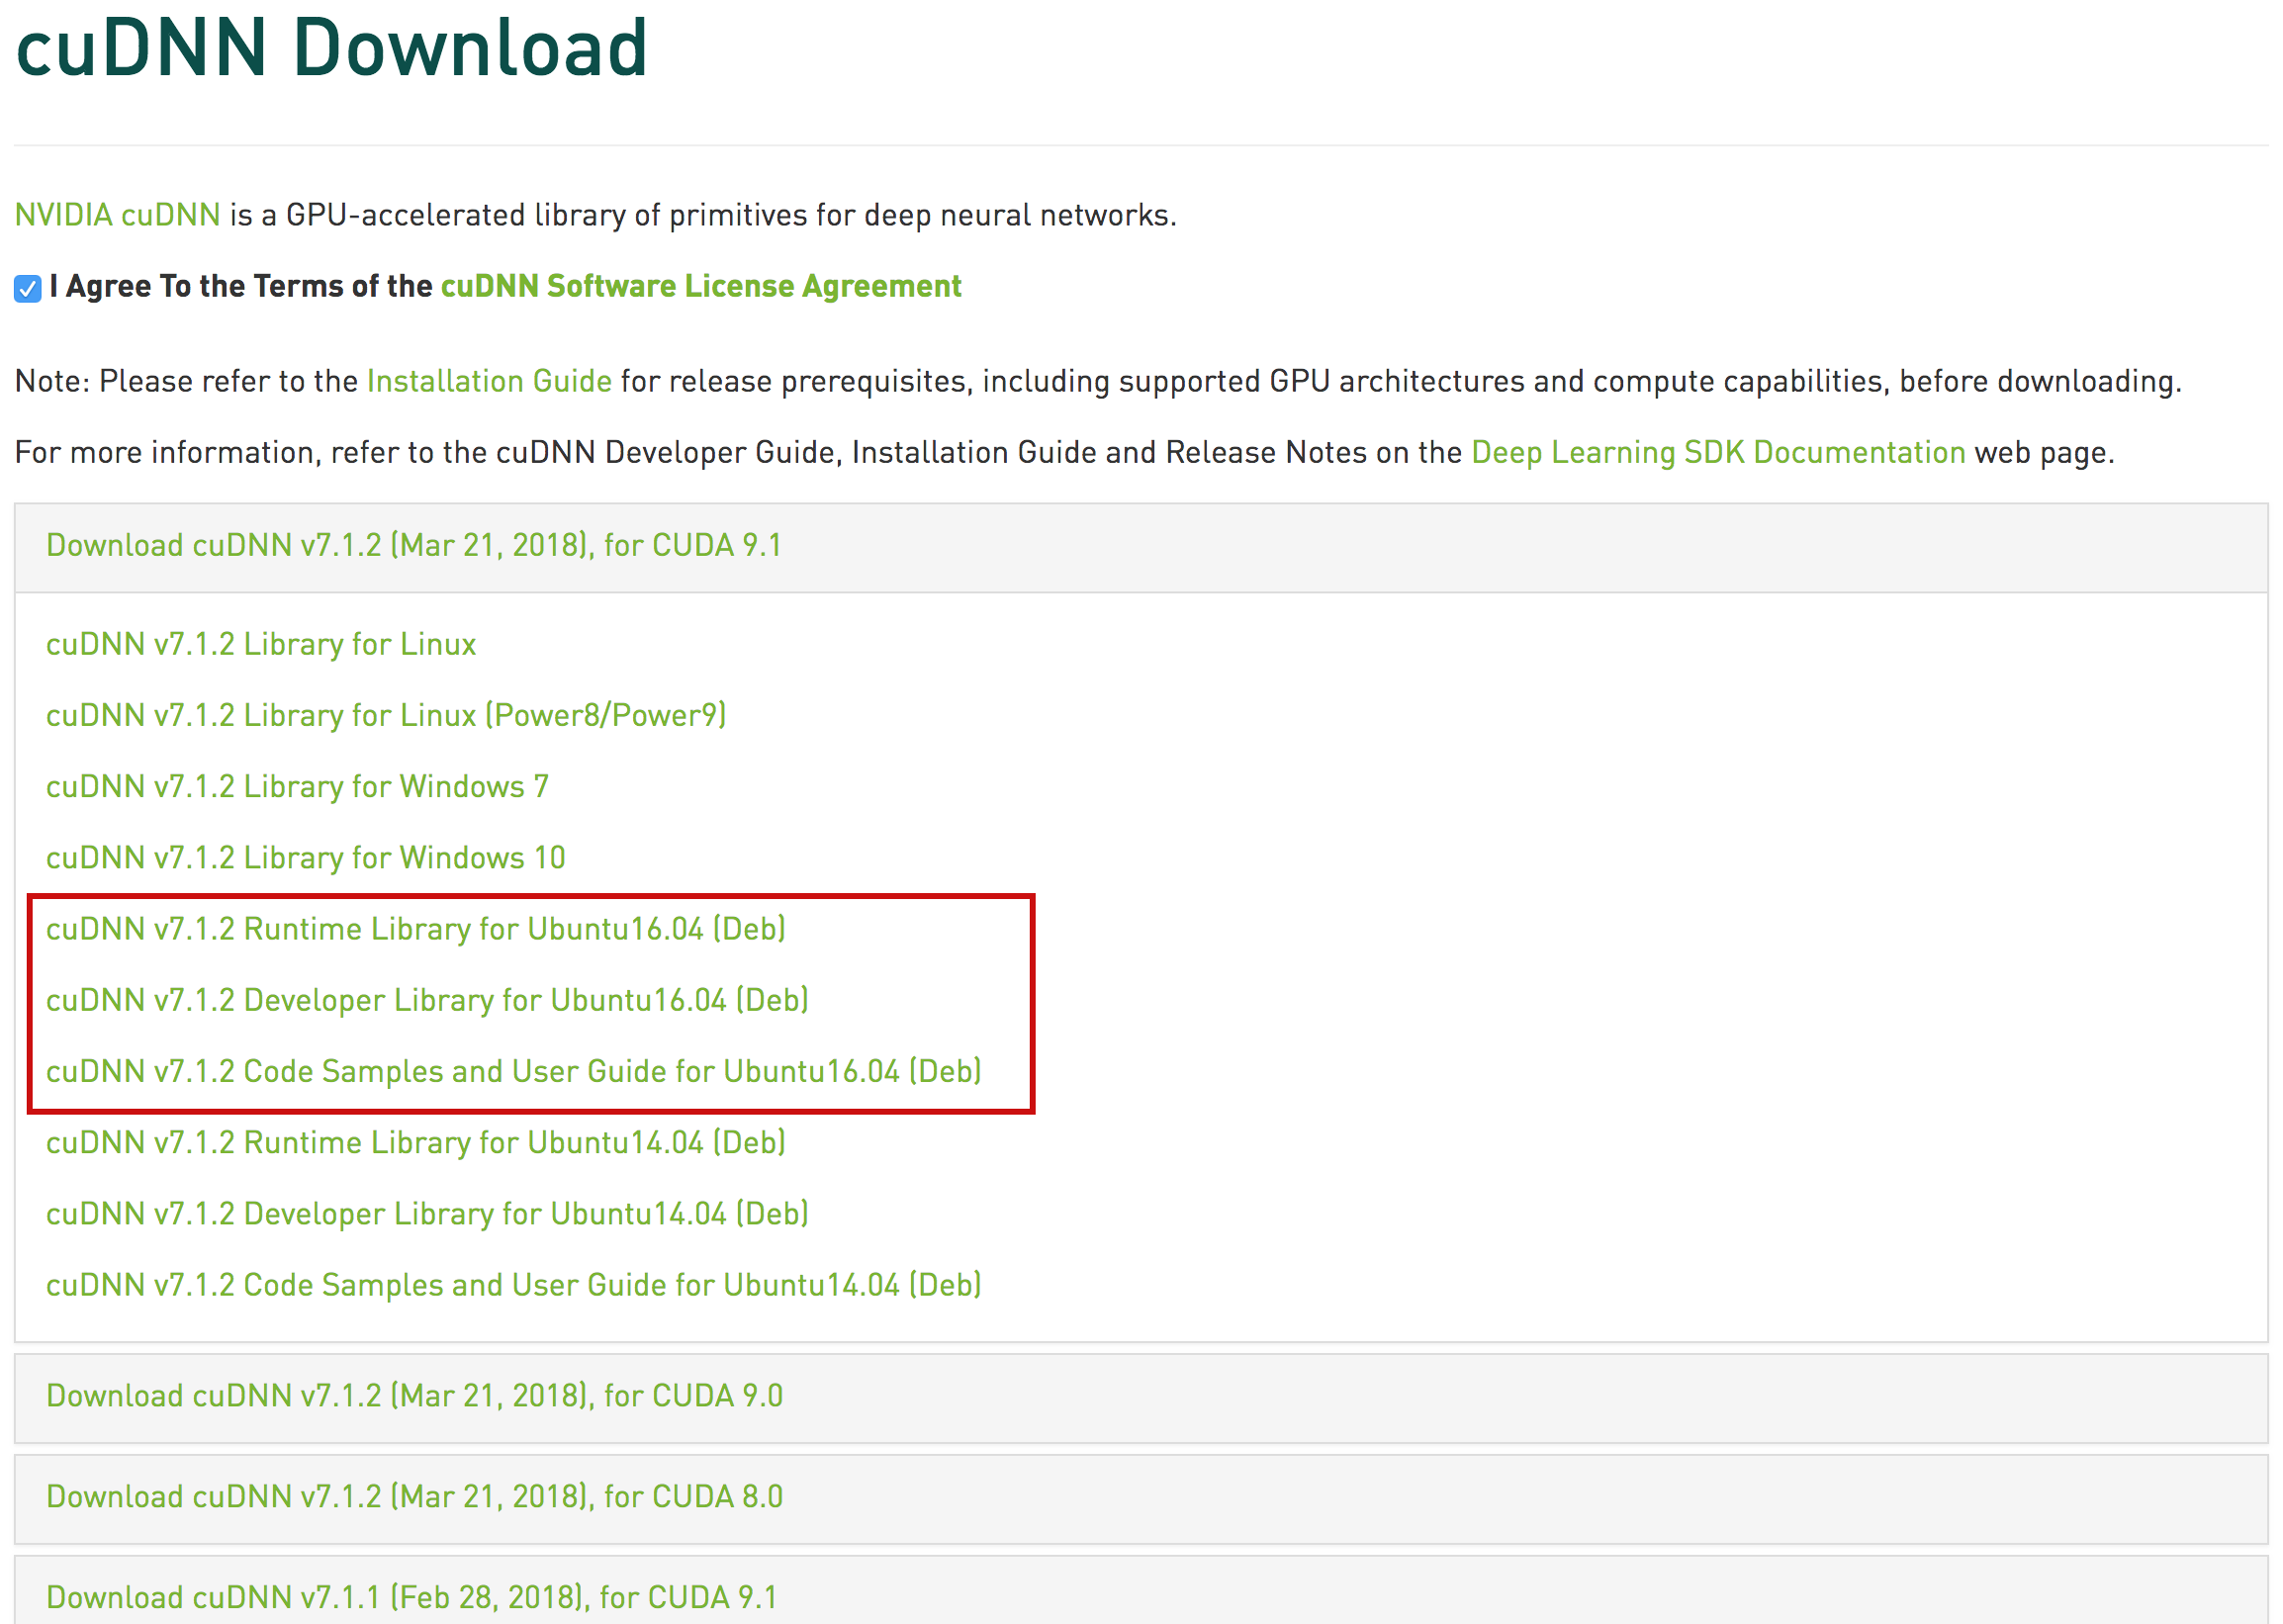
Note: The developer library contains cuDNN header files that are required when developing a deep learning implementation on the Ubuntu machine. If you will not use the machine to compile any deep learning implementation and only use it for running some deep learning implementation, the “Runtime Library” should suffice.
3. Check previous installation of cuDNN
As NVIDIA constantly updates the cuDNN library, we may have previously installed an older version of the library and perform an installation to update to a newer library. To check if the existing installation of cuDNN, we run this command from the shell
$ dpkg -l | grep cudnnSample output:
ii  libcudnn7          7.0.5.15-1+cuda9.1          amd64        cuDNN runtime libraries
ii  libcudnn7-dev      7.0.5.15-1+cuda9.1          amd64        cuDNN development libraries and headers
From the sample output, we have cuDNN runtime library (libcudnn7) and developer library (libcudnn7-dev) installed (the install status code: ii) on the machine. We need to remove those libraries first before installing a newer ones.
To remove the library, we simply use dpkg command again, but with different flag.
– Removing the developer library
$ sudo dpkg -r libcudnn7-dev– Removing the runtime library
$ sudo dpkg -r libcudnn7Note: the order of removal matters due to the dependency
The Installation
After going through the pre-installation steps, we now proceed with the installation as follows.
1. Go to the cuDNN packages download directory
2. Install the package files
From the download page screenshot above, if we download the runtime library and developer library we will have the following files: libcudnn7_7.1.2.21-1+cuda9.1_amd64.deb (runtime) and libcudnn7-dev_7.1.2.21-1+cuda9.1_amd64.deb (dev). We install both library packages with the following command.
$ sudo dpkg -i libcudnn7_7.1.2.21-1+cuda9.1_amd64.deb
$ sudo dpkg -i libcudnn7-dev_7.1.2.21-1+cuda9.1_amd64.deb
$ sudo ldconfig
3. Verify the installation
We will perform the verification in two steps. First, we check if the library and header file have been copied to the designated folders. Finally, we check both libraries install statuses via dpkg.
– Update the database for locations of files and directories
$ sudo updatedb– Check if the runtime library file has been copied to /usr/lib directory
$ locate libcudnn– Check if cuDNN header file has been copied to
$ locate cudnn.h– Recheck the library install statuses via dpkg
$ dpkg -l | grep cudnnWe should see the output similar with the snippet below.
ii  libcudnn7         7.1.2.21-1+cuda9.1       amd64        cuDNN runtime libraries
ii  libcudnn7-dev     7.1.2.21-1+cuda9.1       amd64        cuDNN development libraries and headers
Concluding Remark
Installing cuDNN should be straightforward if we have properly installed CUDA toolkit. If you have issues with your cuDNN installation, simply write the elaboration in the comment section.
Pingback: Guide: Installing Tensor Flow 1.8 with GPU Support against CUDA 9.1 and cuDNN 7.1 on Ubuntu 16.04 « Amikelive | Technology Blog
Pingback: Comprehensive Guide: Installing Caffe2 with GPU Support by Building from Source on Ubuntu 16.04 « Amikelive | Technology Blog
Pingback: How to Properly Install NVIDIA Graphics Driver on Ubuntu 16.04 | Amikelive | Technology Blog
Invalid CUDA environment – crippled the whole system on Windows ! Useless ! With two CPU Multicore Threadripers we have parallels processing at our fingers with no fuzz and tampering in system OS at all for various applications. Not so with CUDA ! Nvidia proprietary and closed system, 99% of user cant use CUDA at all. So what’s the point buying over expensive Nvidia GPU’s – just to have a god damn “racing car sitting in the system garage doing absolutely nothing” ? Parallel processing if hardware supported (if present in the system) should be widely available and supported by default within installing only one app – within complete driver support. Also fraze “parallel processing” suggest parallelism for more than 1 GPU installed in the system trough SLI/NVLINK – well i can tell you – the problematic “crap” way !!! Well we see how AMD GPU parallel processing will evolve (if easier to to use) then ….